Project Corner: Window Awning & Replacement Window Installation

Recently we installed some amazing window awnings for a customer along with replacement windows just in time for winter. We were half the cost of their other bids, and the customer was very happy with the finished project. Check out the before and after photos below.

Window Awning Project - BeforeWindow Awning Project - After

Replacement windows are always a smart investment, especially when winter is looming. When your existing windows become old and inefficient, air leaks can cause the indoor temperature to drop. Not to mention the energy being consumed by your heating/cooling system while it struggles to maintain a comfortable temperature inside your home.

Just because winter is officially here doesn’t mean it’s too late to upgrade your home’s inefficient windows. At American Awnings, Roofing & Windows, we ensure your home will remain warm and pleasant during the installation process. We take the necessary steps to keep the cold air out and make the installation process as quick and painless as possible.

If you’re considering replacement windows for your home or office, contact us today to receive your FREE quote!

Bring More Natural Light Into a Home

Maximizing natural light in a home is a smart and sometimes low-cost renovation. Homes that are dark and drab can drain energy levels and reduce productivity. In addition, dark rooms may not be inviting places to gather as a family or when entertaining.
Bring More Natural Light Into a Home
Certain factors contribute to a dark home. Houses that face north or east may not get the same level of sunlight as those that primarily face south and west. Geographic location also plays a role in the amount of natural sunlight. Mountains, buildings and even latitude can affect the amount of natural light that enters a home.

The style of a home and its attributes also may create dark conditions. Deep house eaves as well as small windows or too few windows also can contribute to a deficit of light indoors. A major remodel certainly can remedy the situation. However, there also are other less-extensive strategies to improve natural light.

• Assess the situation before renovating. Walk around the house and determine which rooms get the most light and which conditions may be contributing to the problem in other areas. Dark floors and walls may be absorbing natural light and compounding the situation. You may find that only one or two rooms need attention, saving you the cost and effort associated with a major home overhaul.

• Lighten up window treatments. Heavy drapes or thick blinds can be replaced with translucent alternatives. Translucent shades will allow light into the room without compromising privacy, say the experts at HGTV.

• Use mirrors strategically. A mirror placed opposite a window will reflect light all around the room. This can make a small room seem larger and a dark space instantly brighter.

• Install new windows and doors. If the budget allows, installing larger windows in a home will allow more natural light in. French doors or sliding doors also may make a home’s interior more bright. Think about adding windows to a side of the house that has none, or increase the size of the windows on the side of the house that gets the most light.

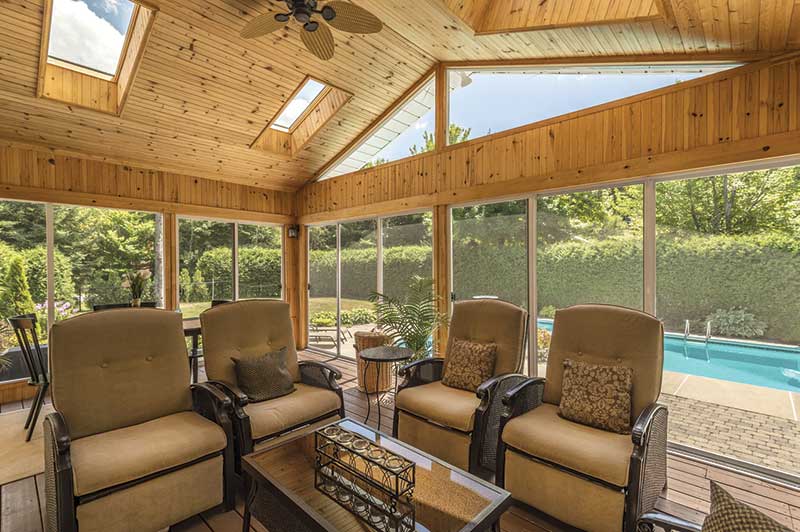
• Maximize sunlight from above. Skylights will bring light into a home as the sun passes overhead. Tubular skylights can bring natural sunlight into spaces where you may not expect skylights to be practical. According to Houzz, a design and architectural resource, tubular daylighting devices, or TDDs, can make a big difference. TDDs are reflective pipes installed between the roof and ceiling, with a clear plastic dome.

• Use reflective decor. Reflective surfaces, including glass and metal, can brighten up a room and diffuse light around a room. Glossy backsplashes, pendant lighting and shiny metal that reflect light can increase the natural light, balancing out dark spaces.

• Prune trees regularly. Cut back branches and keep trees tidy to maximize sunlight. Avoid planting tall shrubbery in front of windows.

• Routinely clean windows and glass doors. Dirt and other grime can prevent light from getting through. Regularly give windows a thorough washing.

Natural light is an important commodity in a home. Sunlight can improve mood and go a long way toward keeping home occupants healthy and happy.

Snow on the Roof Can Be Troublesome

A snow-covered landscape can be a picturesque sight. However, a roof covered in snow is something no homeowner can afford to marvel at. That’s because accumulating snow and ice very well could push a roof to its breaking point, even if the roof was sound before the winter arrived.
Snow on the Roof Can Be Troublesome
According to The University of Arkansas division of Agricultural Cooperative Extension Service, the water content of snow can range from 3 percent for very dry snow to 33 percent for wet, heavy snow. A roof may only be able to support 12 inches of wet, heavy snow before it is pushed to its breaking point. Snow can be quite heavy, weighing around 60 pounds per cubic foot. When heavy snow arrives, homeowners should do their best to safely clear their roofs of snow.

The threat of snow causing a roof to collapse has many homeowners floundering. While having snow build up on the top of a house is dangerous, so, too is climbing up on a slippery roof to push off the snow. As winter approaches, many emergency officials urge people to clear their roofs and decks to minimize structural collapse. But how does one do it safely?

Steep-pitched roofs tend to be the easiest to deal with snow and ice problems because a snow rake is usually effective. A snow rake is just what it sounds like. It is a metal device on a telescoping pole that can be extended to drag the snow off of the roof.

Homeowners may need to use extension ladders to reach taller parts of the roof. A second person can remain below to steady the ladder and ensure it doesn’t tip over on a slick surface.

It is not adviseable to climb up on the roof directly and shovel the snow off. The added weight of a person may be all that’s needed to cause a roof to collapse, potentially resulting in grave injury and considerable roof damage. A snow-covered roof also can be slippery, which could result in a person falling off the roof. Anyone who does not feel secure removing snow from the roof can hire a professional service to do so. Just be sure the service is properly licensed and insured.

In addition to removing the snow from the roof, here are some winter weather home care tips.

• Clean the gutters to remove any debris so that gutters will not become blocked and form ice dams on the roof. In addition, keep gutters and drains free of ice and snow.

• Add insulation to attic floors to prevent heat from the home escaping to the roof and causing ice dams that freeze when snow melts. In addition, make sure the attic is well ventilated so that the temperature inside will remain consistent with outdoors, further preventing snow melt.

• Melted roof snow can leak into homes or pool around foundations, causing rot and other problems. Keep an eye open for any leaks.

• If you live in an area prone to heavy snowfall, a metal roof may be a good investment. The slippery roof causes snow and ice to slide off. Special features at the end of a metal roof break up the snow before it reaches the ground, preventing large, heavy piles of snow from causing injury when falling to the ground.

Get Your Home Fall & Winter-Ready With 5 Simple Projects

(MS) – If boots, a warm hat and a tuned-up snow blower are the only items on your winter preparation list, your home maintenance plan may need a makeover. These simple home maintenance projects can help lower your energy bills, prevent more costly repairs and/or increase the lifespan of your home.
Get Your Home Fall & Winter-Ready Wth 5 Simple Projects
1. Heating & Ventilation – Examine your fireplace and chimney system to ensure that no soot or creosote has collected. Any cracks or voids could potentially cause a fire. Before you turn the furnace or boiler on, replace the air filter and hire a professional to inspect the unit more thoroughly. These steps will improve the efficiency and life of your furnace and will ensure stable indoor air quality.

2. Seal Windows and Doors – If not properly sealed, windows and doors can be a major culprit for heat loss. To keep the warm air inside, inspect the weather-stripping around your home’s windows and doors for leaks, rot or decay. Repair or replace structural framing, and caulk inside and out, if necessary.

3. Insulate well – One of the easiest and most effective defenses against heat loss is proper insulation. Prevent cold drafts from entering and the loss of heated air through basement headers, which, when left exposed, can make your furnace work harder. Look for a moisture-resistant product offering high thermal performance, such as Roxul Comfortbatt insulation. This type of mineral wool insulation makes installation simple. All that’s needed is a serrated blade or bread knife. Cut the batt to fit the cavity and press into place. The insulation will help improve energy efficiency as soon as it’s in place and provide savings over the lifetime of your home. Comfortbatt can also be used to top or replace old attic insulation. Aim for an R-50 or a depth of 16 inches.

4. Backyard Care – Save your property from potential damage by trimming overgrown trees and shrubs to prevent ice-laden branches from thrashing against electrical wires and your home’s exterior. Drain/shut off any exterior faucets and sprinkler systems to prevent freezing. Ensure rain or snow drains away from the house to avoid foundation problems.

5. Roof and Gutters – Inspect your roof for shingles that are warped, damaged or even missing to prevent a future leak. Use roofing cement and a caulking gun to seal joints where water could penetrate, such as around the chimney, skylights or vent pipes. Make sure that your gutters and downspouts are securely fastened. Downspouts should extend at least five feet away from the home to prevent flooding.

When it comes to preventative maintenance, a little time and effort can save thousands in energy costs and repair bills over the lifetime of your home.

What to Look for During Roof Inspections

Cold weather can be tough on a home, and perhaps no part of a home is more vulnerable to harsh winter weather than its roof.

Fallen snow can equate to several pounds of pressure placed on a residential roof. Roofs do not often collapse under heavy snowfall. But adverse winter weather conditions can compromise roofs in other ways. Water leakage and damage to the roof’s interior are just two of the potentially problematic issues that can arise when roofs are battered by cold, blustery weather. That’s why many home improvement specialists advise homeowners to conduct roof inspections prior to the start of winter.
What to Look for During Roof Inspections

Many homeowners can conduct their own cursory roof inspections, but they may not know exactly what to look for. The National Roofing Contractors Association says that there are certain key areas to inspect that may reveal some telltale signs of roof damage.

· Curled, cracked or missing shingles may prove troublesome. Inclement weather can test the strength of even the most durable roofs. Even though many roofs are designed to last up to 30 years, some may need to be replaced early, particularly when they have been exposed to harsh weather over a period of years. Individual shingles can be replaced as spot treatments, but if the damage is widespread, a new roof may be necessary.

· Attic leaks or water elsewhere might signal issues with the roof. Figure out if water inside the home is coming from the roof. Water stains do not always indicate problems with the roofing, but it’s better to be safe than sorry.

· Look for protective granules wearing off. If gutters are filled with the sandy granular material that coats roofing shingles, that may be a sign of an aging or damaged roof.

· Inspect flashing. Professional roofers can recognize properly installed flashing, the material that connects the roof to other parts of the house that adjoin the roof, like skylights or a chimneys. Poorly installed flashing can cause leaks. Stains that appear below chimneys or near attic windows may indicate new flashing, and not new shingles, is needed.

· Gutters and downspouts should be in good condition. A roof is the sum of its parts, and that includes downspouts and gutters. If the gutters are clogged or damaged, they cannot direct water away from the house properly. Snow, leaves and other debris needs to be cleared from gutters to help them function at optimal capacity.

· Animals and insects can cause damage, too. It’s not just poor weather that homeowners need to consider with regard to roof damage. Boring insects and animals may cause problems with roofs as well. A roof inspection may shed light on potential pest problems. Holes or nesting materials may indicate that an animal or animals are using the attic as a shelter from the elements.

Get to the root of issues with your home’s roof before they become bigger problems once winter arrives. A thorough inspection can reveal problems that may prove costly if ignored.